

 ” class=”wp-image-6530″ />
Embracing the Art of Sourdough Bread Making
Sourdough bread has taken the culinary world by storm, becoming a beloved staple in kitchens around the globe. Its deep, complex flavors, chewy texture, and the unique tang derived from wild fermentation set it apart from commercial bread varieties. Among the many types of sourdough, Artisan Sandwich Bread stands out as a versatile option that can be used for everything from a simple morning toast to gourmet sandwiches layered with your favorite ingredients.
Making your own Sourdough Delight Artisan Sandwich Bread at home is not just about baking; it’s an experience that connects you to the age-old tradition of bread-making. This article will guide you through the process of creating your own sourdough bread, emphasizing the importance of each step to ensure a perfect loaf every time. With this detailed recipe, you’ll gain not only a delicious product but also a deeper appreciation for the craft of bread-making.
Understanding Sourdough Bread
The Unique Qualities of Sourdough
At the heart of sourdough bread is the fermentation process, which distinguishes it from other types of bread. Unlike regular bread that relies on commercial yeast for leavening, sourdough uses a naturally occurring culture of wild yeast and lactic acid bacteria. This unique fermentation process contributes to the bread’s distinct tangy flavor and chewy texture, making it a favorite among bread enthusiasts.
Exploring the Fermentation Process
The fermentation process in sourdough bread involves two key players: wild yeast and lactic acid bacteria. The wild yeast ferments the sugars in the flour, producing carbon dioxide gas that causes the dough to rise. At the same time, the lactic acid bacteria produce acids that not only enhance flavor but also improve the bread’s keeping qualities. This dual fermentation process creates a loaf that is not only delicious but also has a longer shelf life compared to commercially yeasted bread.
Health Benefits of Sourdough
Beyond its delightful taste, sourdough bread comes with several health benefits. The fermentation process breaks down gluten, making it easier to digest for some individuals who are sensitive to gluten. Additionally, sourdough’s lower glycemic index means it can lead to more stable blood sugar levels. The presence of beneficial bacteria also contributes to gut health, making sourdough a nutritious choice for bread lovers.
Texture and Flavor Profile of Artisan Bread
The texture of Sourdough Delight Artisan Sandwich Bread is characterized by a crusty exterior and a soft, airy interior. The flavor profile is complex, with a delightful balance of sweetness and tanginess, thanks to the fermentation process. This intricate blend of textures and flavors makes sourdough an ideal choice for a variety of applications, from sandwiches to toast, or simply enjoyed with a pat of butter.
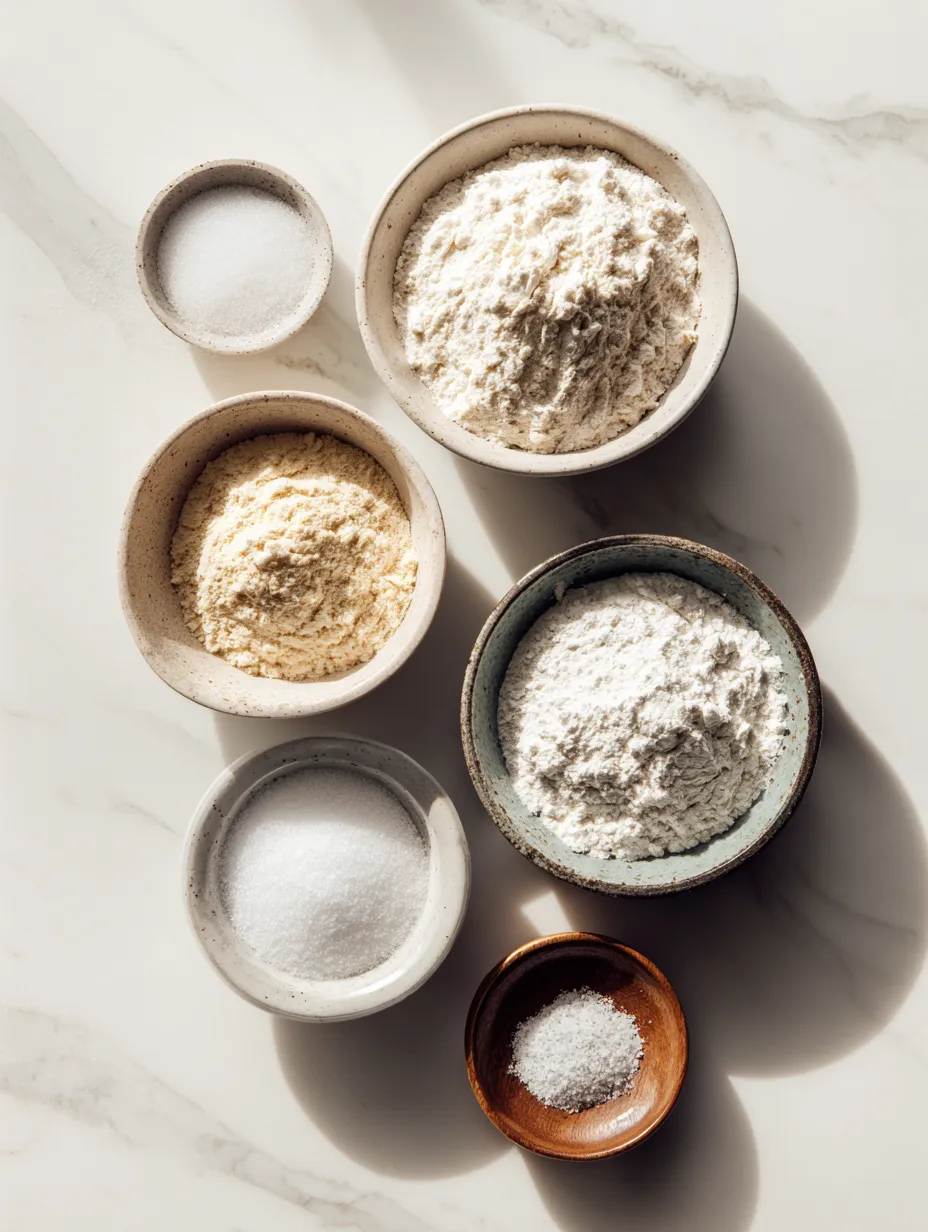
Essential Ingredients for Sourdough Delight
Before diving into the recipe, it’s essential to understand the key ingredients that will contribute to your Artisan Sandwich Bread. Each component plays a vital role in the overall outcome of the loaf.
Breaking Down the Ingredients
– High-Protein Bread Flour: The foundation of any good bread, high-protein bread flour is crucial for developing gluten, which gives bread its structure and chew. Look for flour with a protein content of around 12-14% for the best results.
– Water Temperature: The temperature of the water you use impacts the hydration of the dough. Ideally, you want to use water that is warm but not hot—around 90°F (32°C) is optimal. This temperature encourages yeast activity without killing it.
– Active Sourdough Starter: An active sourdough starter is the star of the show. It should be bubbly and have risen well before you incorporate it into your dough. Keeping your starter well-fed and active is crucial for a successful loaf.
– Salt: Salt is not just for flavor; it plays a significant role in gluten development and fermentation. It strengthens the dough structure and helps regulate yeast activity, ensuring a more controlled fermentation process.
– Optional Sweetness (Honey or Sugar): While not necessary, a touch of sweetness can enhance the flavor of your bread. Honey or sugar can help with browning the crust and balancing the tanginess of the sourdough.
– Olive Oil: The addition of olive oil enriches the dough, resulting in a softer crumb and a tender crust. It also aids in the dough’s extensibility, making it easier to shape later on.
Step-by-Step Guide to Making Sourdough Delight
Now that you have a solid understanding of sourdough bread and its essential ingredients, let’s dive into the process of making your own Sourdough Delight Artisan Sandwich Bread.
Mixing the Dough
The first step in creating your sourdough loaf is to mix the dough. This is where the magic begins.
1. Combine Warm Water and Honey:
– Start by measuring out 350 grams of warm water and adding 1 tablespoon of honey. Stir gently to dissolve the honey in the water. This mixture not only hydrates the flour but also provides a boost to the yeast activity.
2. Incorporate the Sourdough Starter:
– Next, add 100 grams of your active sourdough starter to the warm water mixture. Use a whisk or your hands to mix until the starter is fully dissolved.
3. Create a Shaggy Dough with Bread Flour:
– Gradually add 500 grams of high-protein bread flour to the mixture, stirring with a wooden spoon or your hands until a shaggy dough forms. Make sure all the flour is hydrated, and there are no dry patches left.
The Autolyse Process
After mixing the dough, it’s time to let it rest through a process called autolyse.
What is Autolyse?
Autolyse is a technique that involves resting the flour and water mixture before adding salt and other ingredients. This allows the flour to fully hydrate and start developing gluten, making the dough easier to work with.
Benefits of Allowing the Flour to Hydrate
During this resting period, enzymatic activity in the flour begins to break down starches into sugars and proteins into gluten, resulting in a dough that is more extensible and easier to knead. This step significantly improves the texture of the final loaf.
Timing and Tips for the Perfect Autolyse
Allow the dough to rest for about 30 minutes to 1 hour, covered with a damp cloth to prevent it from drying out. Use this time to prepare your workspace and gather any additional materials you may need for the next steps.
Incorporating Salt and Oil
Once the autolyse period is complete, it’s time to incorporate salt and optional olive oil into the dough.
1. The Importance of Adding Salt After Autolyse:
– Adding salt after the autolyse is crucial because it can inhibit gluten development if added too early. This timing ensures that the dough benefits from the initial hydration phase.
2. Kneading Techniques to Achieve a Smooth Dough:
– Sprinkle 10 grams of salt over the dough and pour in 1 tablespoon of olive oil (if using). Begin kneading the dough by folding it over itself and pushing it down with your palms. Continue this process for about 8-10 minutes until the dough is smooth and elastic. If the dough feels sticky, you can sprinkle a little more flour, but be cautious not to add too much.
Understanding Bulk Fermentation
After kneading, the dough will undergo a critical phase known as bulk fermentation.
Optimal Conditions for Fermentation
Place the dough in a lightly greased bowl, cover it with a damp cloth or plastic wrap, and let it rise at room temperature (ideally around 75-80°F or 24-27°C) for 4 to 6 hours. During this time, the dough should double in size.
Every half hour, perform a series of stretch and folds: grab one side of the dough, stretch it upward, and fold it over itself. Rotate the bowl and repeat this process until you’ve stretched and folded all four sides. This technique strengthens the gluten structure and contributes to the dough’s overall rise.
As you embark on this journey of making Sourdough Delight Artisan Sandwich Bread, take note of each step, savor the process, and enjoy the transformation from humble ingredients to a beautiful loaf of bread. The next part of this article will take you through the final shaping, proofing, and baking stages to complete your sourdough experience. Stay tuned for the continuation of your sourdough adventure!
As we dive deeper into the world of sourdough baking, the journey from mixing ingredients to pulling a freshly baked loaf from the oven can be both rewarding and meditative. In this section, we will explore the crucial steps in the sourdough process, focusing on the stretch and fold technique, shaping the dough, the second rise, and the baking process, followed by tips for serving and enjoying your creation.
The Stretch and Fold Technique Explained
The stretch and fold technique is a critical component in developing the gluten structure of your sourdough bread. This method involves gently stretching the dough and folding it over itself, which helps to build strength without the need for aggressive kneading.
How to Perform the Stretch and Fold
1. First Stretch and Fold: After your autolyse period (the resting time after mixing flour and water), gently pull one side of the dough up and fold it over to the opposite side. Rotate the bowl a quarter turn and repeat this process until you’ve stretched and folded all four sides.
2. Timing: Perform stretch and folds every 30 minutes for the first 2 to 3 hours of bulk fermentation. This technique allows air to be incorporated into the dough, which contributes to its airy structure.
3. Observation: As you stretch and fold, observe how the dough becomes smoother and more elastic. This indicates that your gluten is developing correctly.
How to Know When Your Dough Has Doubled in Size
A successful bulk fermentation phase is vital for achieving the perfect crumb in your sourdough bread. Knowing when your dough has doubled in size can be somewhat subjective, but there are a few techniques to help you gauge its readiness.
Visual and Physical Cues
– Visual Indicators: Look for the dough to have risen significantly in volume, roughly doubling from its original size. The surface will appear smooth and slightly domed.
– Poke Test: Gently poke the dough with your finger. If the indentation springs back slowly and retains its shape, your dough is ready for shaping. If it collapses, it may have over-proofed.
Shaping the Dough
Once the dough has completed its bulk fermentation, it’s time to shape it. Proper shaping is essential for achieving a beautiful, high-rise loaf.
Techniques for Creating a Tight Ball
1. Pre-shaping: Turn the dough out onto a lightly floured surface. Using your hands, gently shape it into a loose ball. Allow it to rest for 15-20 minutes, covered with a damp cloth to prevent drying out.
2. Final Shaping: After resting, flip the dough seam-side up. Gently stretch the edges toward the center to create tension. Flip it over and use your hands to shape it into a tight ball by cupping your hands around the dough and pulling it toward you, creating surface tension.
Resting the Dough for Optimal Gluten Development
After shaping, allow the dough to rest for a short period, about 30 minutes. This rest time helps to relax the gluten, making it easier to shape into a loaf.
How to Shape Into a Rectangular Loaf
For a traditional sandwich loaf, shaping into a rectangle is ideal.
1. Flatten the Dough: Using your fingers, gently flatten the dough into a rectangle on your work surface.
2. Roll It Up: Starting from one short end, carefully roll the dough towards the opposite end, tucking it in tightly as you go to maintain tension.
3. Seal the Seam: Pinch the seam to seal it and place the loaf seam-side down into a prepared loaf pan.
The Second Rise: Preparing for the Oven
After shaping your dough, the second rise is crucial for achieving that perfect airy texture and crust.
Best Practices for the Second Rise
1. Cover the Dough: Use a kitchen towel or plastic wrap to cover the loaf. This prevents the surface from drying out.
2. Temperature: Let the dough rise in a warm, draft-free area. The ideal temperature is around 75-80°F (24-27°C).
How to Know When the Dough is Ready for Baking
– Poke Test: Similar to the bulk fermentation phase, gently poke the dough. If it springs back slowly but retains a slight impression, it’s ready to bake. If it springs back quickly, it needs more time.
Prepping Your Oven
Oven preparation is a key step in the baking process that can significantly affect the outcome of your bread.
Importance of Preheating Your Oven
Preheating your oven is critical for achieving the best rise and crust. Aim for a temperature of around 450°F (232°C) for baking sourdough bread.
Tips for Ensuring Even Baking
1. Use a Baking Stone or Steel: If you have one, place it in the oven during preheating. This helps to retain heat and provides a better baking environment.
2. Add Steam: Create steam by placing a shallow pan filled with water on the bottom rack of your oven. This steam helps to develop a crispy crust.
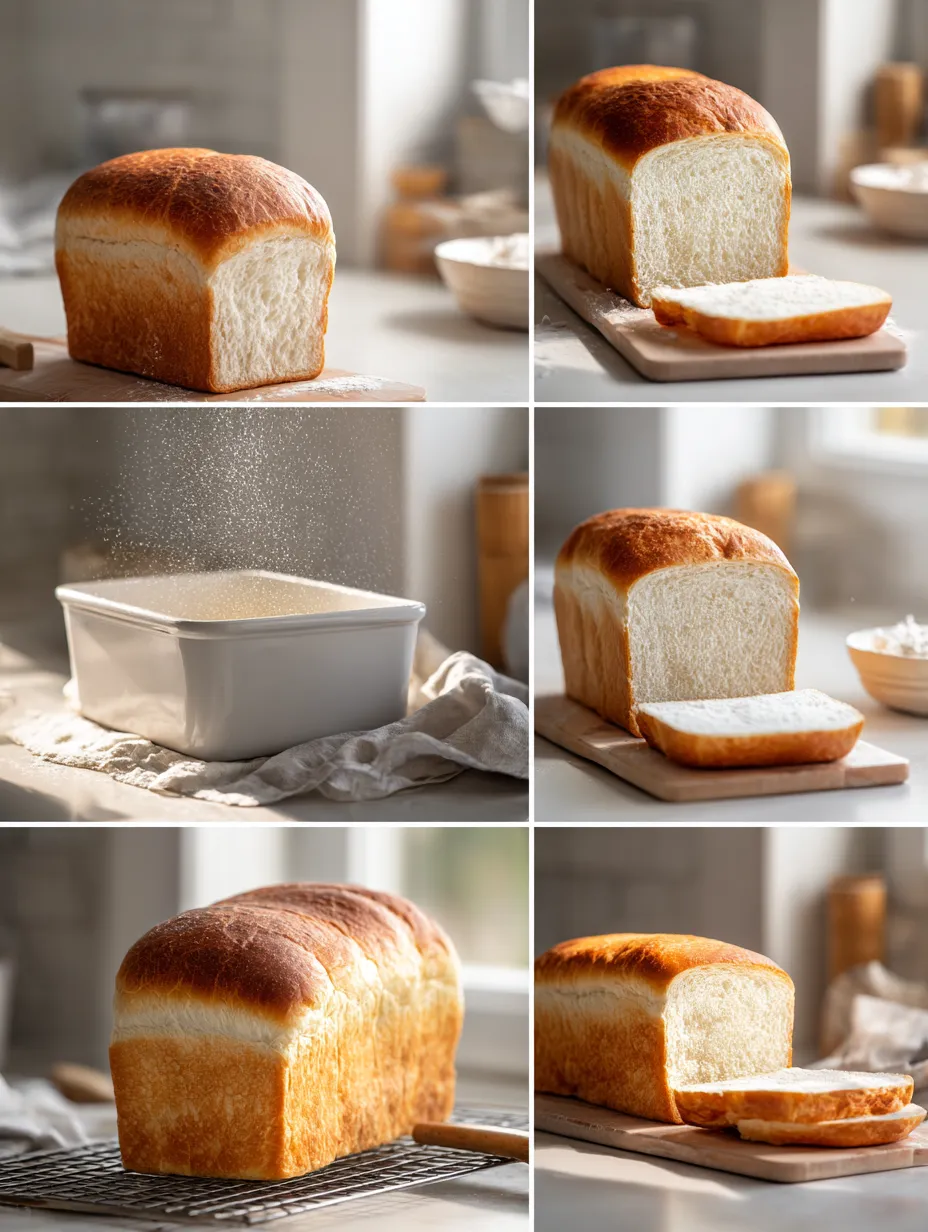
Baking the Bread
With your dough shaped and your oven preheated, it’s time for the main event – baking your sourdough bread.
Scoring Techniques for Controlled Expansion
Before placing your loaf in the oven, it’s essential to score it. This technique allows the dough to expand in a controlled manner during baking, resulting in a lovely oven spring.
1. Use a Sharp Blade: A razor blade or a sharp knife works best for scoring the dough.
2. Make a Single Slash: Aim for a single, confident slash down the center of the loaf. You can also create patterns or designs for an artistic touch.
Baking Times and Temperature Guidelines
1. Initial Bake Time: Bake your loaf for about 20-25 minutes at 450°F (232°C).
2. Reduce Temperature: After the initial bake, reduce the temperature to 400°F (204°C) and bake for an additional 20-25 minutes. This helps to develop the crust without burning it.
How to Tell When Your Bread is Perfectly Baked
– Color: The crust should be a deep golden-brown color.
– Internal Temperature: Use an instant-read thermometer to check the internal temperature. It should read around 200-210°F (93-99°C).
– Hollow Sound: Tap the bottom of the loaf; it should sound hollow when fully baked.
Cooling and Storing Your Bread
Once your bread is baked to perfection, it’s essential to cool it properly before storing it.
Why Cooling is Essential
Cooling allows the moisture inside the bread to redistribute, which prevents the loaf from becoming gummy. It also helps to develop the crust’s texture.
Best Practices for Storing Sourdough Bread
1. Cool Completely: Let your bread cool on a wire rack for at least an hour before slicing.
2. Storage Options: Store your sourdough bread in a paper bag at room temperature for short-term use or freeze it for long-term storage. For freezing, wrap it tightly in plastic wrap and place it in a freezer-safe bag.
How to Enjoy Your Fresh Bread
The best part of baking sourdough bread is enjoying it! There are countless ways to savor your creation.
Classic Ways to Enjoy Sourdough Bread
– Toast with Butter and Jam: A simple but delightful way to enjoy your sourdough. The crusty exterior pairs beautifully with creamy butter and your favorite jam.
– Gourmet Sandwich Recipes: Use your bread for sandwiches with gourmet ingredients. Think fresh mozzarella, basil, and tomatoes for a Caprese sandwich or turkey with avocado and cranberry sauce.
– Using Bread in Salads or for Dipping: Tear your bread into chunks and toss it into salads, or serve it alongside olive oil and balsamic vinegar for dipping.
Creative Pairings with Sourdough
– Cheese and Charcuterie Boards: Pair slices of your sourdough with an assortment of cheeses and cured meats for a delightful charcuterie board.
– Soups and Stews that Complement Sourdough: Serve your bread alongside hearty soups, such as tomato basil or a rich beef stew, to soak up flavors.
Conclusion: The Joy of Homemade Sourdough
Making Sourdough Delight Artisan Sandwich Bread is not just about baking; it’s about connecting with a tradition that spans centuries. The process may seem intricate, but with patience and practice, anyone can master it. Enjoy the fruits of your labor by sharing your homemade bread with family and friends, or savor it solo. Each loaf tells a story of your dedication and love for the craft, making every bite a delightful experience. Embrace this journey and relish the satisfaction that comes from creating something truly special right in your own kitchen.
Whether you’re a seasoned baker or a beginner, the art of sourdough baking is one that rewards you with not only delicious bread but also a deep sense of accomplishment and connection to a timeless culinary tradition. Happy baking!

Sourdough Sandwich Bread
Ingredients
- For the Starter:
- 100g active sourdough starter (fed and bubbly)
- 100g all-purpose flour
- 100g water (room temperature)
- For the Dough:
- 400g bread flour
- 280g water (room temperature)
- 10g sea salt
- 1 tablespoon honey (or maple syrup, for a vegan option)
---
Instructions
1. Prepare the Starter:
- In a medium bowl, combine 100g of active sourdough starter, 100g of all-purpose flour, and 100g of water. Stir until smooth and cover with a kitchen towel. Let it rest at room temperature for 4-6 hours, or until it becomes bubbly and increases in volume.
2. Make the Dough:
- In a large mixing bowl, combine the bubbly starter with 280g of water and 1 tablespoon of honey. Mix until well combined.
- Slowly add 400g of bread flour and 10g of sea salt. Stir with a wooden spoon until the flour is fully absorbed.
3. Knead the Dough:
- Transfer the dough to a floured surface and knead for about 10 minutes until it becomes smooth and elastic. If it’s too sticky, sprinkle a little more flour as needed.
4. First Rise:
- Form the dough into a ball and place it in a lightly greased bowl. Cover with a damp cloth or plastic wrap and let it rise at room temperature for about 4-5 hours, or until doubled in size.
5. Shape the Loaf:
- Gently deflate the risen dough on a floured surface. Shape it into a rectangle, then roll it tightly from the long side to form a loaf. Pinch the seams to seal.
6. Second Rise:
- Place the shaped loaf seam side down into a greased 9x5 inch loaf pan. Cover with a cloth and let it rise for another 2-3 hours, until it has puffed up nicely.
7. Preheat the Oven:
- About 30 minutes before baking, preheat your oven to 425°F (220°C).
8. Bake:
- Once the dough has risen, make a few shallow slashes on top with a sharp knife for steam to escape. Bake the bread in the preheated oven for about 35-40 minutes or until the crust is golden-brown and the internal temperature reaches at least 190°F (88°C).
9. Cool:
- Remove the bread from the oven and let it cool in the pan for about 10 minutes. Then transfer it to a wire rack to cool completely before slicing.
---
Notes
- Substitutions: You can replace up to half of the bread flour with whole wheat flour for a nuttier flavor and added fiber. For a different flavor, consider adding herbs, garlic powder, or even grated cheese to the dough.
- Storage: Store the bread in a paper bag at room temperature for 2-3 days, or freeze for up to 3 months. Wrap it tightly in plastic before freezing.
---