

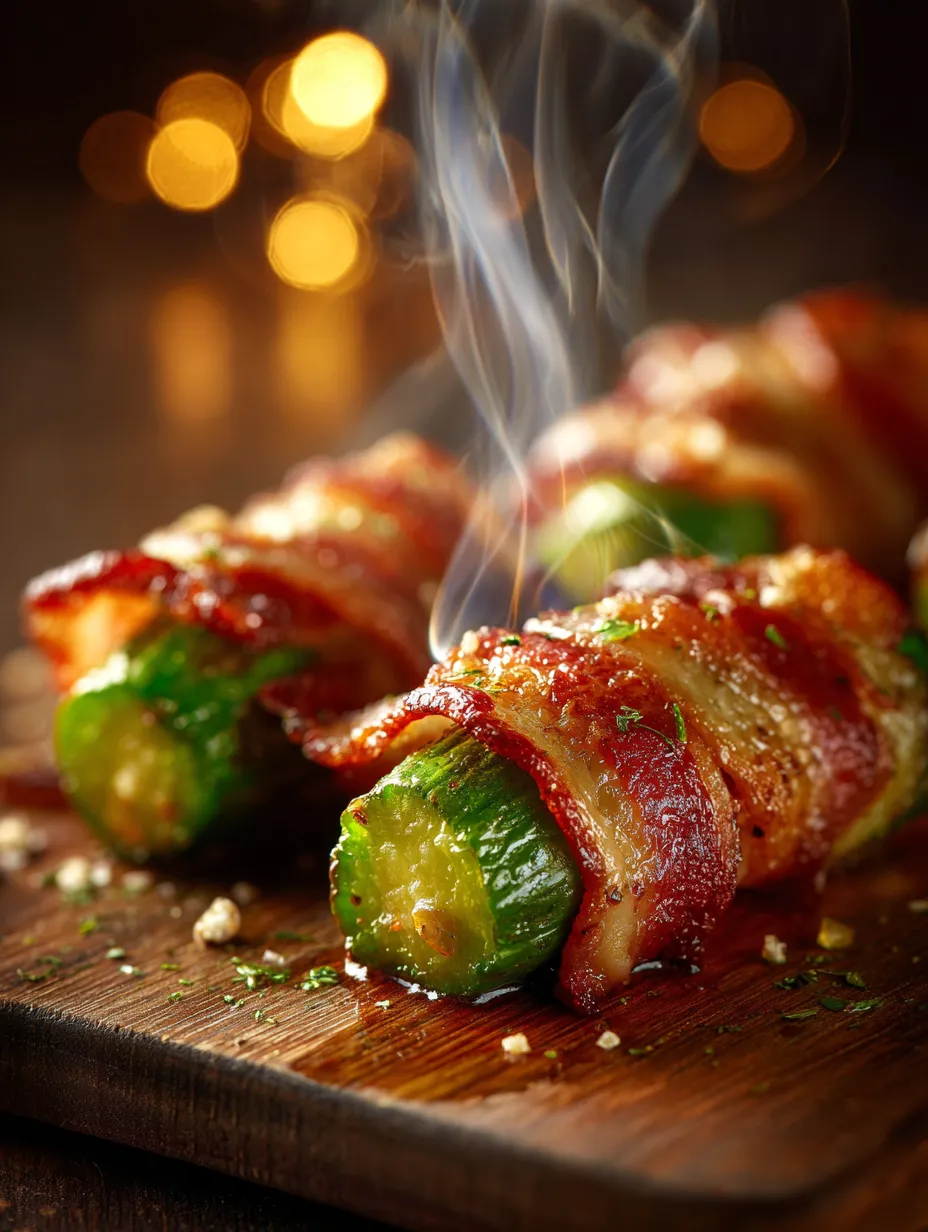
When it comes to appetizers that pack a punch, few can rival the irresistible combination of crunchy, tangy pickles wrapped in crispy, savory bacon. Crunchy Bacon-Wrapped Pickles are not just a snack; they are an experience that tantalizes the taste buds and brings people together. Perfect for game days, parties, or simply as a decadent treat for yourself, this recipe is sure to become a favorite in your culinary repertoire.
In this detailed guide, we will explore the origins of this delightful snack, break down the essential ingredients, and provide you with step-by-step instructions to create these mouthwatering bites. Whether you are a seasoned chef or a novice in the kitchen, you will find this recipe accessible and rewarding.
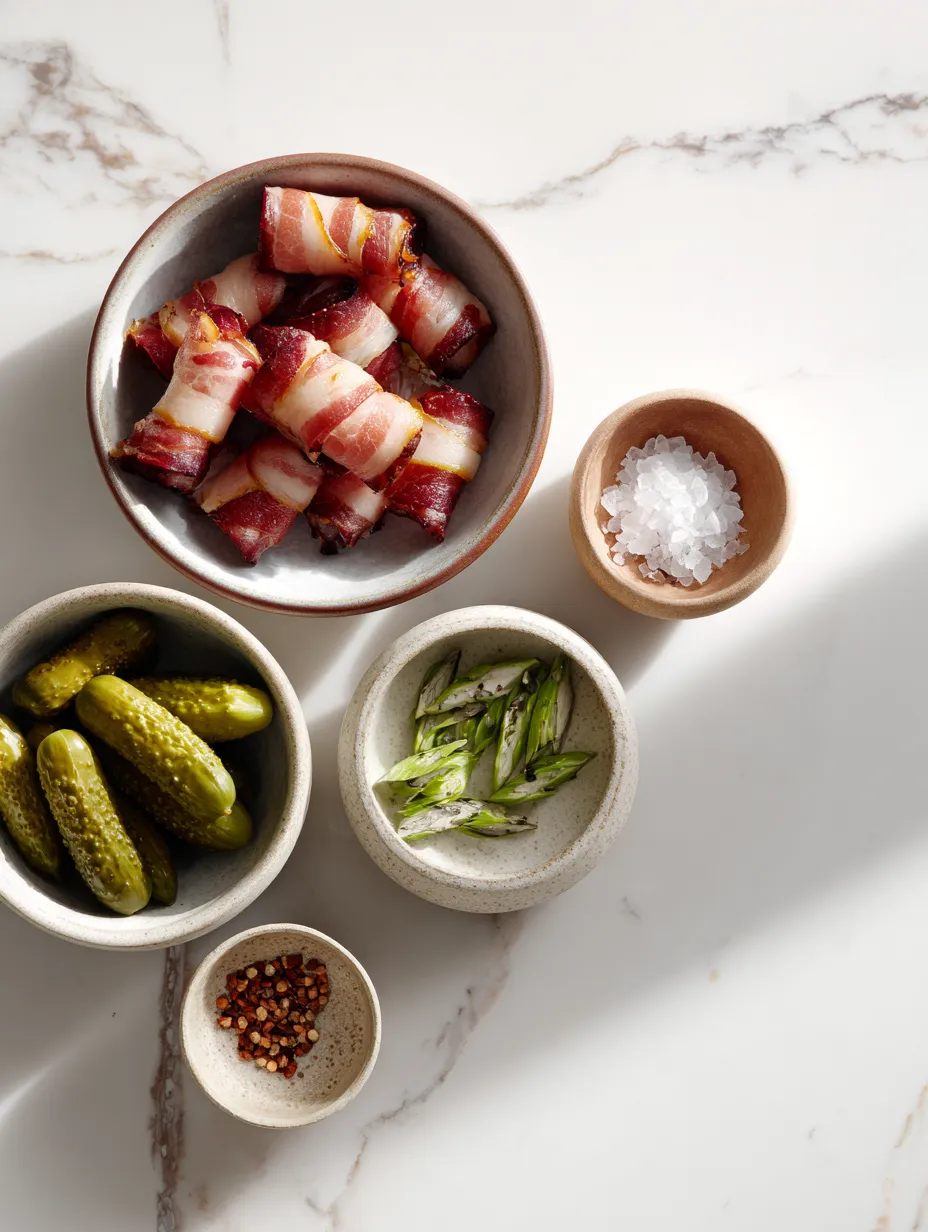
Understanding the Ingredients
To create the perfect Crunchy Bacon-Wrapped Pickles, it’s essential to understand the role of each ingredient. Let’s take a closer look at what makes this appetizer so special.
Dill Pickles: The Star Ingredient
Dill pickles are the foundation of this recipe. Their zesty flavor and crisp texture provide a refreshing contrast to the rich and savory bacon. When selecting pickles, opt for whole dill pickles or spears, as they hold up better during the cooking process.
– Flavor Profile: The tanginess of dill pickles complements the smokiness of the bacon.
– Texture: A crunchy exterior enhances the overall eating experience.
Bacon: Thick-Cut for Optimal Flavor and Crispiness
The bacon is what truly elevates the dish. Thick-cut bacon is recommended for this recipe, as it provides the perfect balance of flavor and texture. When cooked, it crisps up beautifully and envelops the pickles in a savory layer.
– Flavor: The saltiness and smokiness of bacon add depth to the dish.
– Crispiness: Thick-cut bacon ensures that the exterior becomes crispy while the inside remains juicy.
Breading Mixture: Flour, Eggs, and Seasoned Breadcrumbs
The breading mixture is crucial for achieving that crunchy exterior. This recipe uses a combination of flour, eggs, and seasoned breadcrumbs. Each component plays a vital role in creating the perfect coating.
– Flour: Acts as the first layer of breading, providing a base for the egg wash.
– Eggs: Serve as a binding agent, helping the breadcrumbs adhere to the pickles.
– Breadcrumbs: Adds a crunchy texture and can be seasoned for additional flavor.
Spices: Garlic Powder, Smoked Paprika, Black Pepper, and Optional Cayenne for Heat
To enhance the flavor of your Crunchy Bacon-Wrapped Pickles, a blend of spices is added to the breadcrumb mixture. This not only elevates the taste but also adds complexity to an otherwise simple recipe.
– Garlic Powder: Adds depth and savory notes.
– Smoked Paprika: Introduces a subtle smokiness that complements the bacon.
– Black Pepper: Provides a hint of spice.
– Cayenne (optional): For those who enjoy a bit of heat, cayenne pepper can be added to kick things up a notch.
Preparation Steps for Crunchy Bacon-Wrapped Pickles
Now that we’ve covered the ingredients, let’s dive into the preparation steps for creating these delectable snacks. Proper preparation is key to ensuring the best flavor and texture.
Prepping the Pickles
Before you begin wrapping your pickles in bacon, it’s essential to prepare them correctly. This involves draining and drying the pickles to remove excess moisture, which is crucial for achieving the desired crispiness.
Draining and Drying: Importance of Moisture Removal for Crispiness
1. Drain the Pickles: Remove the pickles from their jar and place them in a colander to drain. Allow them to sit for about 10 minutes to ensure that excess brine is removed.
2. Pat Dry: After draining, use paper towels to pat the pickles dry. Removing moisture will help the bacon crisp up during cooking and prevent the breading from becoming soggy.
Slicing and Securing: Optional Use of Toothpicks for Stability
Depending on the size of the pickles you choose, you may want to slice them into smaller pieces. This can make them easier to handle and eat.
– Slice: If using whole pickles, cut them into halves or quarters for bite-sized pieces.
– Secure with Toothpicks: For larger pieces, consider inserting toothpicks to help secure the bacon in place as you wrap. This will also make it easier for your guests to enjoy the snacks.
Wrapping the Bacon
Once your pickles are prepped, it’s time to wrap them in bacon. This step is crucial for achieving that deliciously crispy exterior.
Techniques for Wrapping: Ensuring Full Coverage for Flavor
1. Wrap Each Pickle: Take a slice of thick-cut bacon and begin wrapping it around each pickle piece. Start at one end and spiral the bacon around until the pickle is fully covered. Overlapping the bacon slightly helps ensure full coverage and prevents any gaps.
2. Secure the Ends: If using toothpicks, insert them into the ends of the bacon-wrapped pickles to hold everything in place. Alternatively, you can tuck the ends of the bacon underneath the pickle to secure them as well.
Alternatives to Toothpicks: Other Methods for Securing Bacon
If you prefer not to use toothpicks, there are other methods to ensure the bacon stays in place during cooking:
– Bacon Weave: For a more intricate presentation, you can create a bacon weave and wrap the pickles in this structure.
– Bacon Strips: Instead of whole slices, cut the bacon strips in half and wrap them around the pickles, securing them with a small piece of the bacon itself.
Setting Up Breading Stations
Before you start breading the pickles, it’s essential to set up your breading stations. This organization will streamline the process and keep your workspace tidy.
Importance of Organization: Streamlining the Breading Process
1. Station 1 – Flour: Place all-purpose flour in a shallow dish. This will be the first step in the breading process.
2. Station 2 – Eggs: In a separate bowl, crack a few eggs and whisk them until well combined. This will serve as the binding agent for the breadcrumbs.
3. Station 3 – Breadcrumb Mixture: In another shallow dish, combine seasoned breadcrumbs with your chosen spices. Mix well to ensure even distribution of flavors.
Breakdown of Each Station: Flour, Eggs, and Breadcrumb Mixture Explained
– Flour Station: A light coating of flour will help the egg wash adhere better to the pickles, creating a solid base for the breadcrumbs.
– Egg Station: The egg wash not only binds the breadcrumbs but also adds richness to the overall flavor.
– Breadcrumb Mixture: The seasoned breadcrumbs are where you can get creative. Feel free to adjust the spices based on your preferences or experiment with different breadcrumbs for varied textures.
Breading the Pickles
Now that your pickles are wrapped in bacon and your stations are set up, it’s time to bread the pickles. This step is crucial for achieving that crunchy, golden-brown exterior.
The Art of Dredging
The dredging process involves coating each bacon-wrapped pickle in flour, then dipping it in the egg wash, and finally rolling it in the breadcrumb mixture. Here’s how to do it effectively.
Flour Coating: Purpose and Technique for an Even Layer
1. Coat in Flour: Take each bacon-wrapped pickle and roll it in the flour until it is fully covered. Shake off any excess flour to ensure an even coating.
2. Why Flour?: The flour creates a dry surface that allows the egg to stick better, forming a cohesive layer for the breadcrumbs.
Egg Wash: Binding Agent for Breadcrumbs
1. Dip in Egg Wash: Next, dip the floured pickle into the egg wash, making sure it is thoroughly coated. Allow any excess egg to drip off before moving to the next step.
2. Importance of the Egg Wash: This step is essential for ensuring that the breadcrumbs adhere properly to the surface of the pickle.
Breadcrumb Mixture: Enhancing Flavor with Spices
1. Roll in Breadcrumbs: Finally, roll the egg-coated pickle in the breadcrumb mixture, pressing gently to ensure that the breadcrumbs stick well.
2. Final Touch: Make sure the entire surface is covered in breadcrumbs for that perfect crunch.
With the breading process complete, you are now ready to fry your Crunchy Bacon-Wrapped Pickles to golden perfection.
Stay tuned for the next part of this article, where we will dive into frying techniques, cooking tips, and how to serve these delicious snacks for maximum enjoyment.
In the world of appetizers, few dishes can match the irresistible allure of Crunchy Bacon-Wrapped Pickles. This unique combination of tangy pickles and savory bacon creates a delightful crunch that is hard to resist. In this article, we’ll delve deeper into the preparation process, frying techniques, serving suggestions, and even variations to keep your culinary experience exciting.
Choosing the Right Cooking Oil
The choice of cooking oil plays a significant role in the frying process and ultimately affects the texture and flavor of your Crunchy Bacon-Wrapped Pickles. Here’s what you need to know about selecting the best oil for frying.
Types of Oil: Best Options for Frying
1. Vegetable Oil: A versatile option, vegetable oil has a high smoke point (around 400°F or 204°C), making it ideal for frying. It has a neutral flavor that won’t interfere with the taste of the bacon or pickles.
2. Canola Oil: Similar to vegetable oil, canola oil is another excellent choice with a high smoke point and a light flavor profile. It’s rich in omega-3 fatty acids and is often used in many kitchens.
3. Peanut Oil: Known for its slightly nutty flavor, peanut oil has a high smoke point (about 450°F or 232°C) which makes it perfect for frying. It adds a subtle flavor that can enhance the dish.
4. Sunflower Oil: With a smoke point of around 440°F (227°C), sunflower oil is another good frying option. It also has a light flavor, allowing the bacon and pickles to shine through.
Temperature Control: Importance of Maintaining 350°F (175°C)
Maintaining the right frying temperature is crucial for achieving perfectly crispy bacon-wrapped pickles. The ideal frying temperature is 350°F (175°C). Here’s why it matters:
– Crispiness: Frying at the right temperature helps to create a crispy outer layer while keeping the inside juicy. If the oil is too hot, the bacon may burn before the pickles are adequately heated. If it’s too low, the bacon will absorb excess oil, resulting in a soggy texture.
– Even Cooking: Consistent temperature ensures that each pickle is cooked evenly, providing a uniform crunch.
To maintain the temperature, use a kitchen thermometer to monitor the oil as you fry. Adjust the heat accordingly to keep the temperature steady.
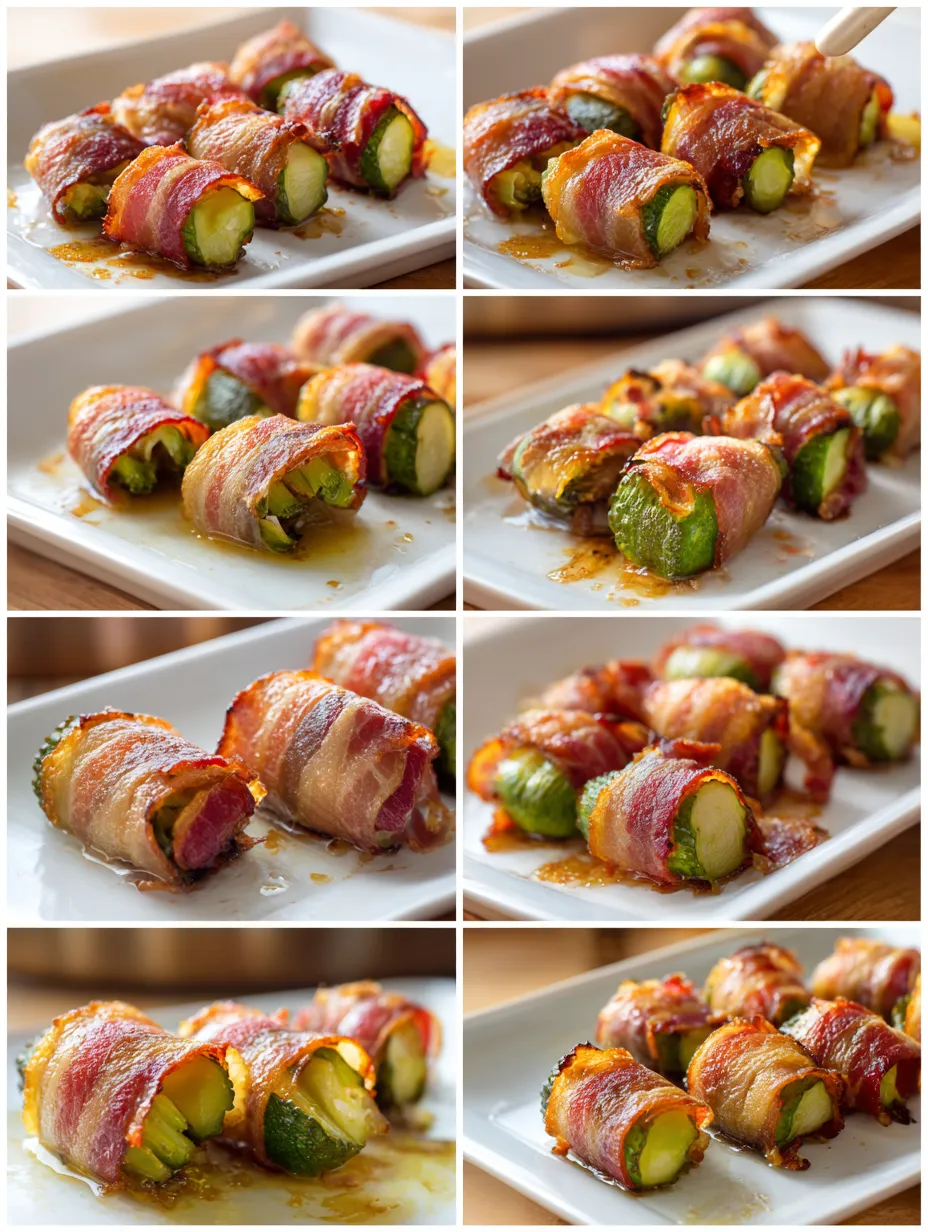
Frying Techniques
Frying your bacon-wrapped pickles properly is key to achieving that perfect crunch. Here are some essential tips for optimal frying.
Batch Frying: Avoiding Overcrowding for Optimal Crispiness
When frying, it’s important not to overcrowd the pan. Here’s why:
– Heat Retention: Adding too many pickles at once can lower the oil temperature, leading to uneven cooking and soggy results.
– Circulation: Allowing enough space between each pickle ensures that hot oil can circulate freely, creating an even crisp on all sides.
For best results, fry in small batches of 3-4 pickles at a time, depending on the size of your frying pan.
Timing: Perfect Frying Duration for Golden-Brown Bacon
The frying time for your bacon-wrapped pickles will vary slightly depending on the thickness of the bacon and the size of the pickles. However, generally, you can expect the following:
– Fry for 3-4 Minutes: Keep an eye on your pickles as they cook. You’re looking for a beautiful golden-brown color on the bacon.
– Flip if Needed: If your frying pan has hot spots, consider flipping the pickles halfway through cooking to ensure they brown evenly on all sides.
Once they are golden brown and crispy, remove them from the oil and prepare for the next step.
Draining and Serving
After frying, it’s essential to handle your crunchy bacon-wrapped pickles properly to ensure the best texture and flavor.
Post-Frying Care
Draining Excess Oil: Using Paper Towels to Maintain Crunch
Once your pickles are fried to perfection, it’s important to drain the excess oil. Here’s how to do it effectively:
1. Use a Slotted Spoon: Remove the pickles from the frying oil using a slotted spoon, allowing excess oil to drip back into the pan.
2. Place on Paper Towels: Transfer the pickles to a plate lined with paper towels. This will absorb any remaining oil and help keep your pickles crispy.
Cooling Time: Allowing Pickles to Reach Perfect Serving Temperature
Allow the bacon-wrapped pickles to cool for a few minutes before serving. This cooling period helps the bacon crisp up even more as it settles. Aim for a serving temperature that is warm but not too hot to handle.
Presentation Ideas
The way you present your Crunchy Bacon-Wrapped Pickles can enhance their appeal. Here are some serving suggestions:
Serving Suggestions: Pairing with Dipping Sauces
Bacon-wrapped pickles are fantastic on their own, but pairing them with dipping sauces can elevate the experience. Here are a few ideas:
– Ranch Dressing: A classic choice that complements the flavors well.
– Spicy Aioli: For those who enjoy a kick, a spicy aioli can add an exciting twist.
– Honey Mustard: The sweetness of honey mustard pairs wonderfully with the salty bacon.
Plating Techniques: Making the Dish Visually Appealing
To make your dish stand out:
– Use a Platter: Arrange the pickles on a large platter for a communal feel.
– Garnish: Add fresh herbs like parsley or cilantro as a garnish to provide a pop of color.
– Sauce Bowls: Serve dipping sauces in small bowls placed around the pickles for easy access.
Variations to Explore
While the classic bacon-wrapped pickles are delightful, you can experiment with variations to cater to different tastes and dietary preferences.
Creative Twists on the Classic Recipe
Cheese-Stuffed Pickles: Adding a Creamy Element
For a creamy surprise, consider stuffing your pickles with cheese before wrapping them in bacon. Here’s how:
1. Choose Your Cheese: Cream cheese, cheddar, or pepper jack work great.
2. Stuff the Pickles: Use a piping bag to fill the pickles with cheese before wrapping them in bacon.
The melted cheese adds a delicious richness that takes your dish to the next level.
Spicy Variants: Incorporating Different Heat Levels
For those who enjoy heat, consider adding spicy elements:
– Jalapeño Bacon: Use bacon infused with jalapeño for an extra kick.
– Hot Sauce: Brush the pickles with your favorite hot sauce before wrapping them in bacon.
These spicy variations will appeal to those who love bold flavors.
Vegetarian Alternatives: Using Plant-Based Bacon
For a vegetarian or plant-based option, consider using vegan bacon or tempeh bacon. The preparation is similar, and you can enjoy all the crunch and flavor without the meat.
Nutritional Information
Understanding the nutritional content of your Crunchy Bacon-Wrapped Pickles can help you make informed choices, especially if you’re serving them at a party or gathering.
Serving Size: Analysis Based on Two Pickles per Serving
A standard serving size is typically two bacon-wrapped pickles. Here’s a general breakdown of the nutritional information you might expect:
– Calories: Approximately 150-200 calories per serving (depending on the type of bacon used)
– Protein: 5-8 grams
– Fat: 12-15 grams
– Carbohydrates: 2-4 grams
These figures can vary based on the specific ingredients used, particularly the type of bacon or any added ingredients like cheese.
Caloric Content: Overview of Calories and Macronutrients
When preparing for a gathering, keeping track of the caloric content can help you manage portion sizes. If you’re looking to reduce calories, consider:
– Using Turkey Bacon: A lower-fat alternative that still provides flavor.
– Baking Instead of Frying: For a healthier version, try baking the bacon-wrapped pickles in the oven until crispy.
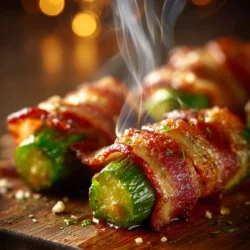
Conclusion
Crunchy Bacon-Wrapped Pickles are not just a recipe; they are a celebration of flavors and textures that can elevate any occasion. With easy-to-follow steps and the right ingredients, you can create a dish that is sure to impress. Whether enjoyed at a party or a cozy night in, these pickles offer a perfect blend of crunch and savory goodness that will leave everyone asking for more. Embrace your culinary creativity, and enjoy the delightful experience of making and sharing this unique appetizer.
Whether you stick with the classic recipe or explore exciting variations, these Crunchy Bacon-Wrapped Pickles are bound to be a hit on any dining table!
Crunchy Bacon-Wrapped Pickles
Ingredients
- 12 medium-sized dill pickles (whole)
- 12 slices of thick-cut bacon
- 1 cup all-purpose flour
- 2 large eggs
- 1 cup seasoned breadcrumbs (or panko for extra crunch)
- 1 teaspoon garlic powder
- 1 teaspoon smoked paprika
- ½ teaspoon black pepper
- ½ teaspoon salt
- Cooking spray (or olive oil for brushing)
- Optional: dipping sauces (ranch, spicy mayo, or BBQ sauce)
Instructions
1. Preheat the Oven: Preheat your oven to 400°F (200°C) and line a baking sheet with parchment paper or aluminum foil for easy cleanup.
2. Prepare the Pickles: Drain the dill pickles and pat them dry with paper towels to remove excess moisture. This will help the bacon crisp up better.
3. Wrap the Pickles: Take a slice of bacon and wrap it around each pickle, starting at one end and spiraling it to the other end. Secure the ends with toothpicks if necessary.
4. Set Up Breading Station: In three separate bowls, prepare your breading station:
- In the first bowl, place the flour.
- In the second bowl, beat the eggs until smooth.
- In the third bowl, mix the seasoned breadcrumbs, garlic powder, smoked paprika, black pepper, and salt.
5. Bread the Pickles: Take each bacon-wrapped pickle:
- First, dip it in the flour, shaking off any excess.
- Next, coat it in the beaten eggs, letting the excess drip off.
- Finally, roll it in the seasoned breadcrumbs until fully covered.
6. Arrange on Baking Sheet: Place the breaded, bacon-wrapped pickles onto the prepared baking sheet, ensuring they are spaced out and not touching.
7. Bake: Lightly spray the tops with cooking spray (or brush with olive oil) for extra crispness. Bake in the preheated oven for 20-25 minutes or until the bacon is crispy and golden brown, turning halfway through cooking.
8. Serve: Once done, remove from the oven and let them cool slightly before serving. Enjoy with your favorite dipping sauce!
Notes
- Storage: Leftovers can be stored in an airtight container in the refrigerator for up to 3 days. Reheat in the oven to keep the bacon crispy.
- Spices: Feel free to add your favorite spices or herbs to the breadcrumb mixture for a custom flavor.