
Introduction
There’s something undeniably magical about the combination of chocolate and peanut butter. This classic pairing has captured the hearts (and taste buds) of dessert lovers worldwide, offering a rich, creamy experience that feels indulgent yet comforting. Among the many delightful forms this duo can take, chocolate peanut butter lava cookies stand out as a decadent treat that promises to satisfy even the most intense cravings.
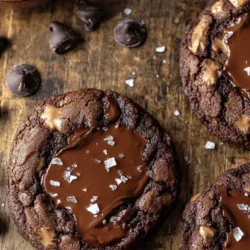
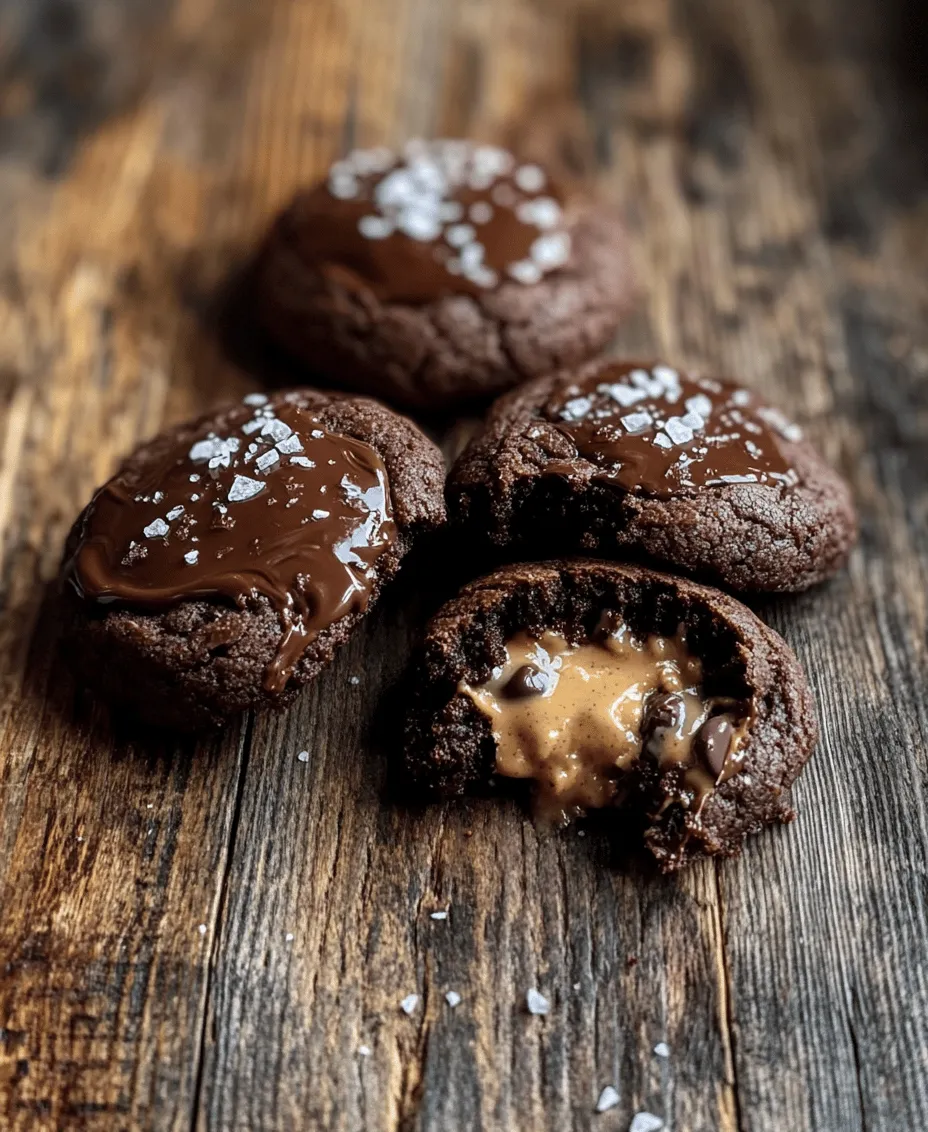
Lava cookies are a unique twist on traditional cookies, featuring a molten center that oozes chocolatey goodness with each bite. This gooey surprise not only enhances the overall flavor profile but also adds an element of surprise that delights both kids and adults alike. Picture this: you take a bite, and the warm, luscious chocolate flows out, perfectly mingling with the creamy peanut butter. It’s a moment of pure bliss that makes baking these cookies a worthwhile endeavor.
In the world of home baking, cookies hold a special place. They are more than just snacks; they are vessels for creating memories. Whether you’re baking for a special occasion, a cozy night in, or just to satisfy your sweet tooth, homemade cookies provide an opportunity to connect with loved ones. The aroma wafting through your kitchen as these chocolate peanut butter lava cookies bake is bound to evoke nostalgic feelings and create an inviting atmosphere perfect for sharing.
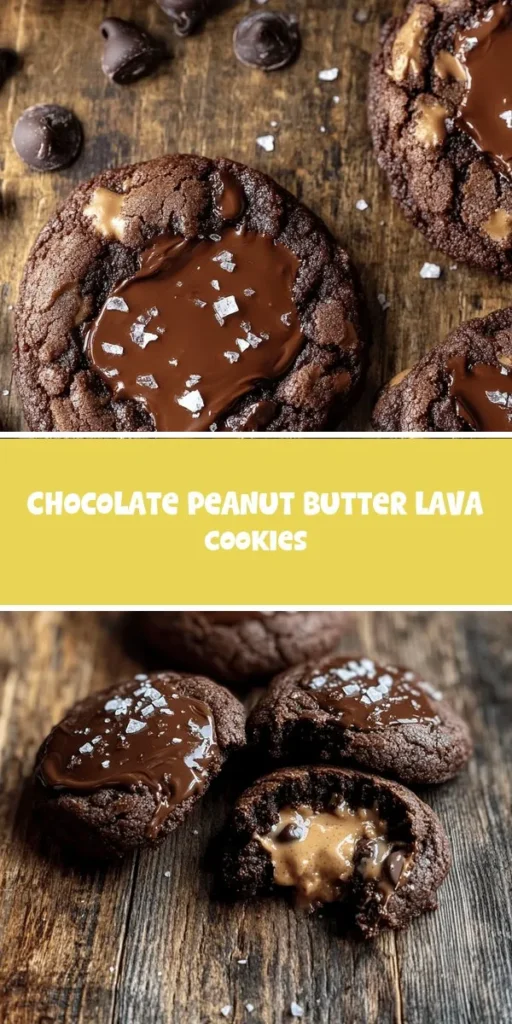
The Allure of Chocolate Peanut Butter Lava Cookies
Chocolate peanut butter lava cookies are a delightful fusion of flavors and textures. The outside boasts a slightly crispy edge, while the inside houses a rich, gooey center that combines the best of both chocolate and peanut butter. The contrast between the two textures creates a satisfying bite that is both chewy and creamy, making each cookie an indulgent experience.
The rise in popularity of lava cookies can be attributed to their unique presentation and the element of surprise they offer. With their ooey-gooey centers, they have become a favorite at bakeries and social media feeds alike, often showcased in mouthwatering images that tempt even the most disciplined eaters. The trend of baking lava cookies has gained traction in recent years, with various flavor combinations emerging, but the classic chocolate and peanut butter remains a beloved choice.
Baking is not just about the end product; it’s also about the joy of the process. There’s a certain satisfaction that comes from mixing ingredients, watching them transform, and finally enjoying the fruits of your labor. Sharing these irresistible treats with family and friends only amplifies the joy, as each cookie is a little piece of happiness. Whether enjoyed warm from the oven or at room temperature, chocolate peanut butter lava cookies are sure to bring smiles and delight to your gathering.
Essential Ingredients for Your Lava Cookies
To create the perfect chocolate peanut butter lava cookies, it’s crucial to understand the role of each ingredient in the recipe. Here’s a detailed breakdown of what you’ll need to bring these cookies to life:
– All-Purpose Flour: This is the foundation of your cookie dough. It provides structure and stability, ensuring that your cookies hold their shape while they bake.
– Cocoa Powder: Unsweetened cocoa powder adds depth and richness to the chocolate flavor. It’s essential for achieving that deep, dark chocolate taste that pairs beautifully with peanut butter.
– Baking Soda: This leavening agent helps the cookies rise slightly, creating a tender texture that complements the gooey center.
– Salt: A pinch of salt enhances the flavors of both the chocolate and peanut butter, balancing sweetness and bringing out the richness of the ingredients.
– Unsalted Butter: Butter not only adds flavor but also contributes to the cookie’s tenderness. Using unsalted butter allows you to control the amount of salt in the recipe.
– Granulated Sugar and Brown Sugar: These sugars work together to create the perfect sweetness. Brown sugar adds moisture and a hint of caramel flavor, while granulated sugar helps with the cookie’s spread during baking.
– Eggs: Eggs bind the ingredients together and provide moisture. They also contribute to the overall texture, making the cookies soft and chewy.
– Peanut Butter: The star of the show! Creamy peanut butter adds richness and flavor. You have the option to use natural or conventional peanut butter, each offering a slightly different taste and texture.
– Chocolate Chips: Semi-sweet chocolate chips are typically used for the gooey center, providing a melty, chocolatey surprise. You can also explore dark or milk chocolate chips for different taste experiences.
Choosing high-quality ingredients is vital for optimal flavor in your cookies. The better the ingredients, the more delicious your cookies will be. You might also consider variations by using different types of peanut butter, such as crunchy for added texture or flavored varieties for an exciting twist. For chocolate, dark chocolate chips can provide a richer taste, while white chocolate can create a unique contrast with the peanut butter.
Preparing Your Kitchen for Baking
Before you dive into the cookie-making process, it’s important to prepare your kitchen for a seamless baking experience. Here are some tips for organizing your workspace:
1. Clear Your Counterspace: Make sure your work area is clean and free of clutter. This will help you move efficiently as you mix and measure your ingredients.
2. Gather Your Ingredients: Lay out all the ingredients needed for the recipe before you start. This will save you time and prevent any last-minute searches for essential items.
3. Preheat Your Oven: Preheating the oven is a critical step in baking. Set your oven to the required temperature before you begin mixing the dough, so it’s ready when you are.
4. Use Parchment Paper: Line your baking sheets with parchment paper to prevent the cookies from sticking and to ensure even baking. This also makes for easy cleanup afterward.
5. Gather Your Tools: Ensure you have all the necessary tools on hand. You’ll need mixing bowls, measuring cups, a whisk or mixer, a spatula, and cookie sheets. Having everything ready will make the process smoother.
6. Set Up a Cooling Rack: If you have a cooling rack, place it on your counter. Once the cookies are baked, transferring them to a cooling rack will help them maintain their texture and prevent sogginess.
With your kitchen organized and ready, you are now prepared to embark on the exciting journey of creating chocolate peanut butter lava cookies. The next step is diving into the detailed instructions that will guide you through each stage of the process, ensuring that you achieve cookie perfection.
Stay tuned for the step-by-step instructions that will lead you to your very own batch of gooey, decadent chocolate peanut butter lava cookies!
Comprehensive Guide Through Each Step of the Preparation Process
Baking chocolate peanut butter lava cookies is an art that requires precision and a bit of technique. Let’s break down the preparation process step by step to ensure that your cookies turn out perfectly every time.
Step 1: Creaming Butter and Sugars
The first step in creating your cookie dough is to cream together the butter and sugars. This step is crucial because it incorporates air into the mixture, giving your cookies a light and airy texture.
1. Start with Room Temperature Butter: Ensure your butter is softened to room temperature, which allows for easier mixing. Cold butter can lead to a dense texture.
2. Combine Ingredients: In a large mixing bowl, combine the softened butter with granulated sugar and brown sugar.
3. Mixing Technique: Use an electric mixer on medium speed to beat the butter and sugars together until the mixture is light and fluffy, typically about 3 to 5 minutes. You’ll know it’s ready when the mixture is pale in color and has a creamy consistency.
Step 2: Incorporating Dry Ingredients
Next, it’s time to add your dry ingredients. This step can often be overlooked, but it’s vital for achieving the perfect texture in your cookies.
1. Sift Your Dry Ingredients: In a separate bowl, combine your all-purpose flour, cocoa powder, baking soda, and salt. Sifting these ingredients helps to eliminate lumps and ensures even distribution.
2. Gradual Incorporation: Slowly add the dry mixture to the creamed butter and sugars. It’s important to combine them on a low speed to avoid flour clouds and overmixing.
3. Mix Until Combined: Mix just until the dry ingredients are incorporated. Overmixing can develop the gluten in the flour, which will result in tough cookies. You want a soft, slightly sticky dough that holds together but is not overly elastic.
The Art of Shaping and Baking Your Cookies
Once your dough is ready, it’s time to shape the cookies and prepare them for baking.
Shaping Cookie Dough and Creating the Lava Center
1. Chill the Dough: Before shaping your cookies, chill the dough for about 30 minutes. This helps prevent the cookies from spreading too much while baking.
2. Forming the Cookies: Scoop out a generous tablespoon of dough and flatten it slightly in your hand. Place a teaspoon of peanut butter in the center and wrap the dough around it, ensuring it is fully enclosed.
3. Roll into Balls: Roll the dough into a smooth ball. This technique ensures that when they bake, the peanut butter will create that gooey lava center.
Baking Tips: Knowing When Cookies Are Perfectly Done
Baking is a science, and knowing when your cookies are done can make all the difference.
1. Preheat Your Oven: Ensure your oven is preheated to 350°F (175°C). A consistent temperature is key for even baking.
2. Baking Time: Bake the cookies for 10-12 minutes. You’ll know they are done when the edges are set, but the centers are still soft. They may look slightly underbaked, which is perfect for achieving that molten center.
3. Cooling Process: After removing the cookies from the oven, allow them to cool on the baking sheet for 5 minutes before transferring them to a wire rack. This cooling period is vital; it allows the cookies to set while maintaining that gooey center.
Serving Suggestions: Elevating the Experience
Once your cookies are baked and cooled, it’s time to enjoy them. Here are some fantastic serving suggestions to enhance the experience.
Pairing with Ice Cream or Toppings
1. Ice Cream Delight: Serve warm cookies with a scoop of vanilla or chocolate ice cream on top. The contrast of warm and cold creates a delightful sensory experience.
2. Drizzle of Chocolate: Consider drizzling melted chocolate or caramel sauce over your cookies for an extra indulgent touch.
3. Nutty Toppings: Chopped peanuts or a sprinkle of sea salt can enhance the flavors and add a crunchy texture.
The Sensory Experience of Enjoying Warm Cookies
The experience of biting into a warm chocolate peanut butter lava cookie is unlike any other. The rich chocolate exterior gives way to a warm, gooey peanut butter center that oozes out, creating a perfect balance of flavors.
Beverage Pairings
To complement the rich flavors of your cookies, consider serving them with:
1. Milk: A classic pairing that never goes out of style. The creaminess of milk balances the richness of the cookies.
2. Coffee or Espresso: The bitterness of coffee can perfectly offset the sweetness of the cookies, making for a delightful combination.
3. Tea: A warm cup of herbal tea can provide a soothing contrast to the rich chocolate flavors.
Nutrition and Dietary Considerations
While indulgent treats like chocolate peanut butter lava cookies are delightful, it’s essential to be mindful of nutrition and dietary preferences.
Overview of Nutrition Facts
Each cookie contains approximately:
– Calories: 150-200
– Fat: 8-10 grams
– Carbohydrates: 20-25 grams
– Protein: 3-4 grams
Potential Substitutions for Dietary Restrictions
If you or your guests have dietary restrictions, consider the following substitutions:
1. Gluten-Free: Substitute all-purpose flour with a gluten-free flour blend. Ensure that the blend includes xanthan gum for proper texture.
2. Dairy-Free: Use vegan butter or coconut oil in place of regular butter, and opt for dairy-free chocolate chips.
3. Lower Sugar: You can reduce the sugar content slightly or use natural sweeteners like maple syrup or coconut sugar.
Balance of Indulgence and Moderation
Desserts are meant to be enjoyed, but moderation is key. Consider serving smaller portions or enjoying these cookies as a special treat rather than a daily indulgence. Balancing your diet with nutritious foods will enhance your overall enjoyment of sweet treats.
Conclusion
Baking chocolate peanut butter lava cookies is not just about satisfying your sweet tooth; it’s an enjoyable experience that brings joy and comfort to the kitchen. The process of creaming, mixing, and shaping your cookies leads to a final product that is rich, delicious, and utterly satisfying.
We encourage you to try this recipe, share it with friends and family, and relish the moments spent together enjoying these homemade delights. There’s something truly special about the comfort and happiness that comes from baking, and with each bite of your chocolate peanut butter lava cookies, you’ll find a little piece of joy. So gather your ingredients, preheat your oven, and get ready to indulge in a treat that celebrates the delightful combination of chocolate and peanut butter.