

A Guilt-Free Indulgence that Ticks All the Boxes
Introduction
Imagine a warm summer afternoon, the sun spilling golden rays across your backyard, and the sweet scent of blooming flowers fills the air. On days like these, nothing quite hits the spot like a scoop of ice cream, but the guilt that often accompanies such indulgences can be a real mood dampener. Enter the Cottage Cheese Ice Cream — a revelation that brings together nostalgia, nutrition, and delightful flavor all in one creamy scoop.
I remember the very first time I decided to whip up this masterpiece. It was a spontaneous decision, sparked by the remnants of a cottage cheese container lingering in my fridge. With the sound of my blender whirring to life, the kitchen quickly filled with the enticing aroma of vanilla and honey mingling together. As I poured the mixture into my ice cream maker, the anticipation bubbled within me. The vibrant white of the blended cottage cheese created a beautiful canvas for the eventual mix-ins — dark chocolate chips that twinkled like little gems against the creamy backdrop.
As I took that first bite of my freshly churned creation, the smooth texture danced on my palate, balanced perfectly by the subtle sweetness and a hint of tang from the lemon juice. I was amazed at how a simple dairy staple could transform into a luscious dessert that felt indulgent yet wholesome. This recipe quickly became a summertime staple in my home, a go-to treat that not only satisfied my sweet tooth but also filled me with protein and nutrients.
So, if you’re looking for a delicious way to enjoy dessert without the guilt, let me guide you through the steps of creating your own Cottage Cheese Ice Cream. You’ll soon find it’s the perfect blend of health and happiness.
Why This Recipe Works
The beauty of this Cottage Cheese Ice Cream lies in its clever combination of flavors and textures that come together to create a dessert that’s both satisfying and nutritious. At its core, this recipe utilizes well-drained low-fat cottage cheese as the primary ingredient, which not only imparts a creamy texture but also boosts the protein content significantly. This is a game changer, especially for those looking to enjoy dessert while adhering to a more health-conscious lifestyle.
The addition of unsweetened almond milk serves to thin out the mixture while keeping it dairy-friendly, though you can easily swap it for any milk of your choice. The natural sweetness from honey or maple syrup harmonizes beautifully with the subtle saltiness of the cottage cheese, enhancing the overall flavor profile without overwhelming your palate.
Lemon juice plays a dual role here; it brightens the flavors and adds a refreshing tang that cuts through the richness of the cottage cheese, making each bite feel light and invigorating. This unique combination of sweet and tart really sets this ice cream apart from typical store-bought options, which often rely on artificial flavorings and excessive sugars.
When it comes to texture, the blending process is crucial. You’ll want to achieve a smooth and creamy base before churning, allowing air to incorporate during the freezing phase. This results in a soft-serve consistency that’s delightful and surprisingly luscious. Additionally, the option to fold in dark chocolate chips or crushed nuts adds delightful surprises of texture and flavor, transforming each scoop into an experience.
What Makes It Special
This Cottage Cheese Ice Cream stands out for several reasons, setting it apart from the generic, mass-produced ice creams you might find at the supermarket.
– High Protein Content: Unlike traditional ice cream that can be laden with sugars and empty calories, this recipe boasts a hefty dose of protein, making it a satisfying choice for a post-workout treat or a midday pick-me-up.
– Customization: When you make this ice cream at home, you have complete control over the ingredients. Want to amp up the chocolate flavor? Add more cocoa powder. Prefer a fruity twist? Toss in some fresh strawberries or blueberries before churning.
– Fresh and Wholesome: Nothing beats the taste of homemade ice cream. You know exactly what goes into your treat, avoiding artificial preservatives and fillers often found in store-bought varieties.
– Surprising Versatility: The use of cottage cheese may sound unconventional, but its creamy texture and slight tang give this ice cream a unique flavor that elevates it beyond typical frozen desserts. You can serve it plain, mixed with your favorite add-ins, or even use it as a base for fun variations like mocha or chai spice.
Ingredient Breakdown
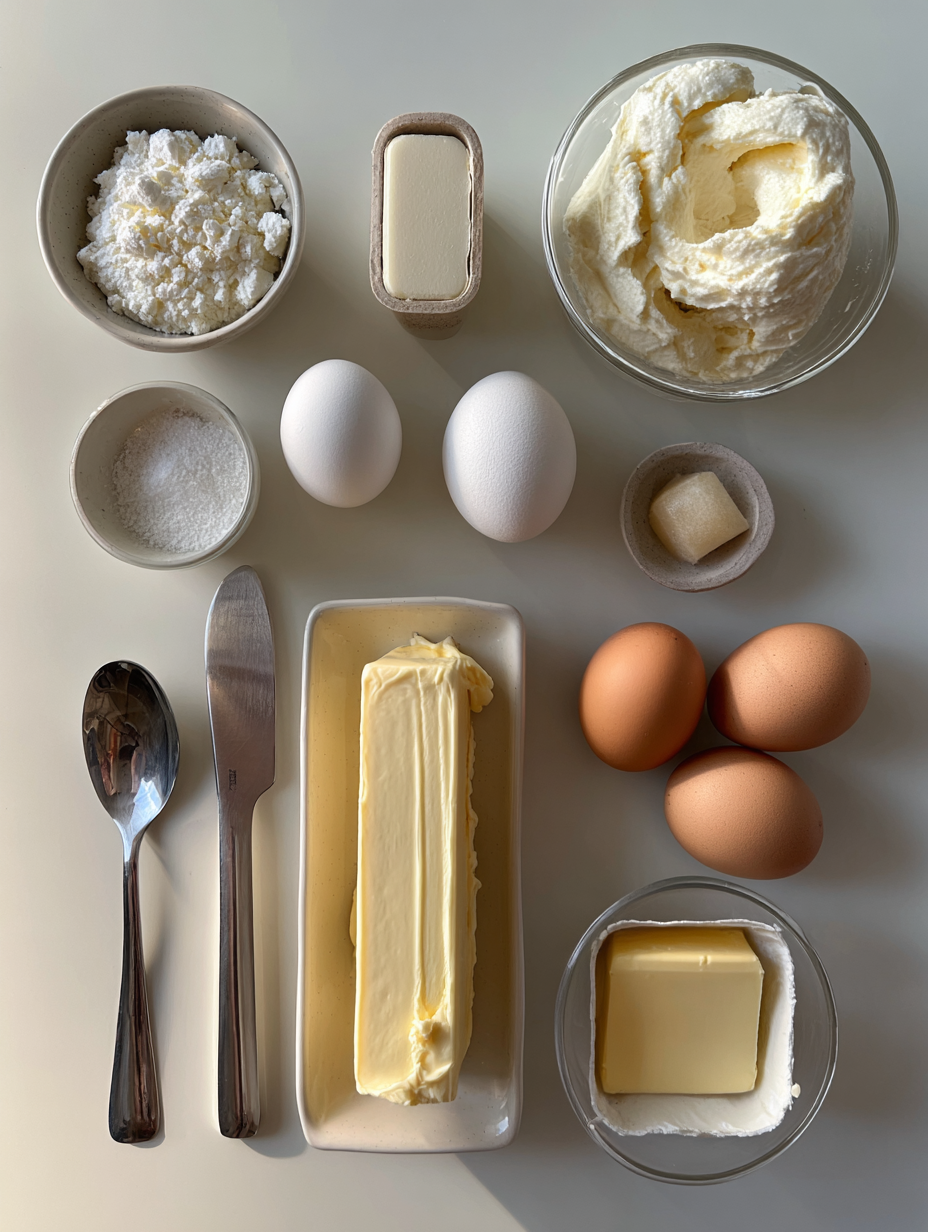
Now, let’s dive into the specifics of each ingredient that creates this delightful Cottage Cheese Ice Cream:
– Low-Fat Cottage Cheese (2 cups): This is the star of your dessert, providing a creamy base and a hefty dose of protein. Using well-drained cottage cheese ensures your ice cream won’t be too watery. For an even richer texture, consider opting for full-fat cottage cheese.
– Unsweetened Almond Milk (1 cup): This dairy-free option helps to blend the mixture smoothly and keeps the calorie count lower. You can substitute this with any milk of your choice, such as oat, soy, or even regular dairy milk.
– Honey (1/2 cup): This natural sweetener adds a delightful flavor while complementing the cottage cheese. If you’re looking for a vegan alternative, maple syrup is an excellent substitute that provides a unique taste as well.
– Vanilla Extract (1 teaspoon): A must-have for enhancing the overall flavor profile, bringing warmth and depth to your ice cream.
– Salt (1/4 teaspoon): Just a pinch enhances the sweetness and balances the flavors, ensuring that your ice cream doesn’t taste flat.
– Lemon Juice (1 tablespoon): Freshly squeezed, this ingredient brightens the flavor and adds a refreshing tang that elevates your treat from merely sweet to spectacular.
– Dark Chocolate Chips (1/2 cup, optional): These add a delightful richness and texture. Look for high-quality chocolate that’s at least 70% cocoa for the best results.
– Crushed Nuts (1/2 cup, optional): Almonds, walnuts, or pecans can add a satisfying crunch and an extra layer of flavor.
– Cocoa Powder (1 tablespoon, optional): If you’re in the mood for a chocolate version, this ingredient quickly transforms your base into a rich, decadent dessert.
You can find these ingredients at most grocery stores, but for specialty options like unsweetened almond milk or high-quality dark chocolate, heading to health food stores or online markets may yield better results.
Equipment Needed
To create this creamy, protein-packed delight, you’ll need a few essential tools:
– Blender: A high-powered blender is crucial for achieving that perfectly smooth and creamy base. If you don’t have one, a food processor can work in a pinch.
– Ice Cream Maker: This is key for achieving the right texture. It incorporates air as it churns, creating a light and fluffy consistency. If you don’t own an ice cream maker, you could try the no-churn method, where you freeze the blended mixture in a container, stirring every 30 minutes until it reaches the desired consistency, but this takes longer.
– Mixing Bowls: You’ll need a couple of bowls for combining ingredients and tasting along the way.
– Spatula: This handy tool will help you fold in any mix-ins and scoop the ice cream into your container.
– Airtight Container: Once your ice cream is churned, you’ll need a container to store it in the freezer. An airtight option will prevent ice crystals from forming, keeping your ice cream creamy.
If you don’t have an ice cream maker, consider borrowing one from a friend or looking for affordable used models online. You’ll find that the investment is well worth the delicious rewards!
Step-by-Step Instructions
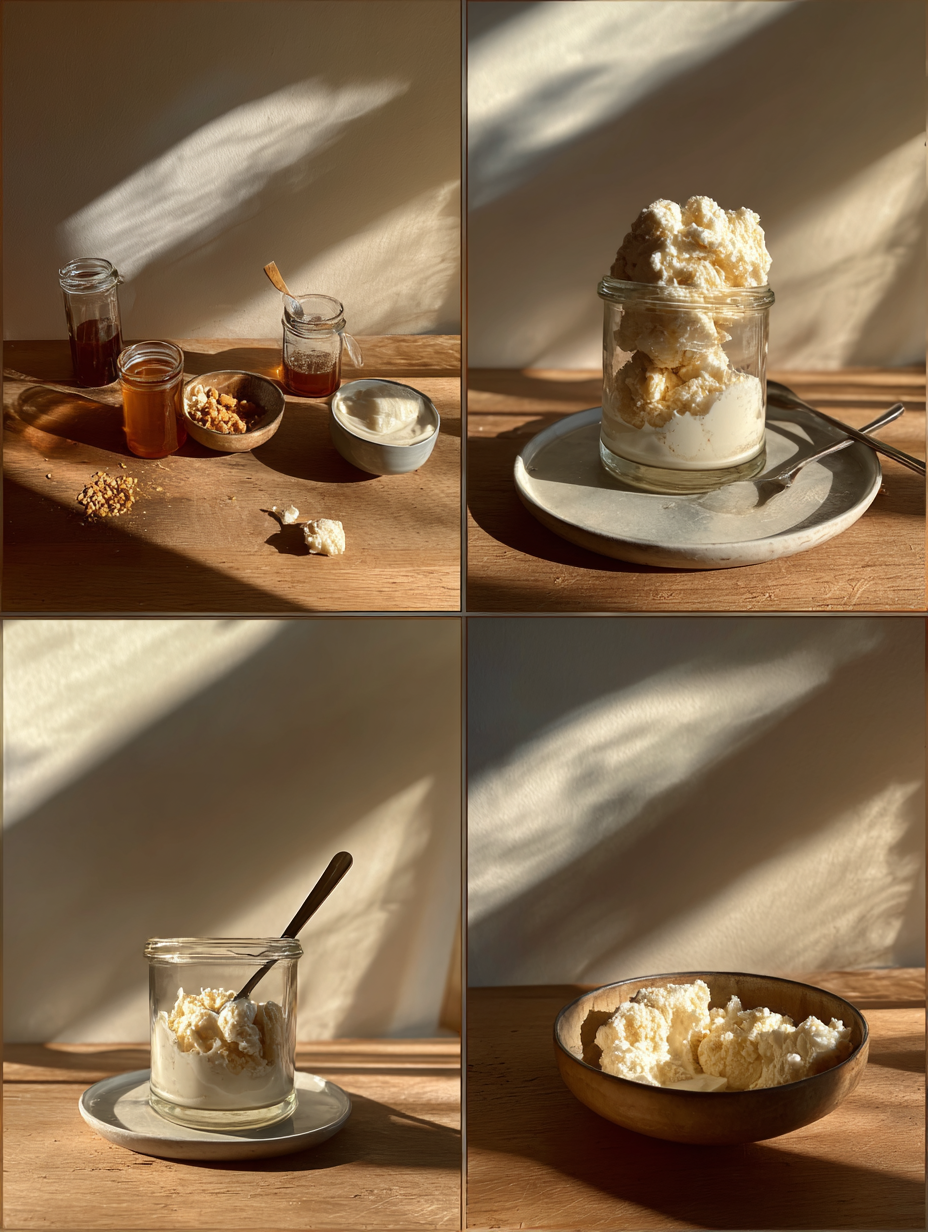
1. Prepare the Base
Start by gathering all your ingredients on a clean countertop. Place 2 cups of well-drained low-fat cottage cheese in your blender. It’s crucial that the cottage cheese is well-drained to ensure your ice cream isn’t too watery. Blend the cheese on high for about 30 seconds. You should hear the whirring of the blades and see the texture transform; it should become smooth and creamy without any lumps. Chef’s Note: If your cottage cheese isn’t blending smoothly, consider using a spatula to scrape down the sides, then blend again.
2. Add Liquid Ingredients
Next, pour in 1 cup of unsweetened almond milk and 1/2 cup of honey (or maple syrup for a vegan option). Add 1 teaspoon of vanilla extract, 1/4 teaspoon of salt, and 1 tablespoon of freshly squeezed lemon juice. Blend the mixture for another 1-2 minutes. The sound should shift to a quieter, steady hum as everything combines. The mixture should be completely smooth, and you should be able to smell the sweet and tangy notes of vanilla and lemon.
3. Adjust Sweetness and Flavor
Taste your blended mixture. This is your chance to customize! If you prefer it sweeter, add another drizzle of honey or maple syrup and blend again briefly. If you desire a chocolatey flavor, add 1 tablespoon of cocoa powder at this stage. Blend for 30 seconds until fully combined, and again, check the texture to ensure it’s creamy and smooth. Chef’s Note: Remember, the sweetness will mellow a bit once frozen, so don’t be afraid to go a bit sweeter here.
4. Churn the Ice Cream
Once you’re satisfied with the flavor, transfer the mixture into your ice cream maker. Follow the manufacturer’s instructions for churning, typically for about 20-25 minutes. During this time, you should hear the sound of the churner working, and the mixture should begin to thicken. You’re aiming for a soft-serve consistency, which should look fluffy and hold its shape slightly when you lift some out with a spoon.
5. Mix in Optional Add-ins
If you’re using dark chocolate chips or crushed nuts, gently fold them in now using a spatula. Do this carefully to avoid overmixing, which could deflate the airy texture you’ve just created. Mix until evenly distributed, but don’t worry if some chunks remain visible. You want to retain that delightful texture and surprise with each scoop!
6. Freeze to Firm Up
Scoop the churned ice cream into a container with a lid. Spread it out evenly and smooth the top. Freeze for at least 2 hours to allow it to firm up completely. You’ll know it’s ready when you can easily scoop it out with a spoon. Chef’s Note: For the best texture, make sure your freezer is set to a stable, cold temperature (around -5°F or -20°C).
7. Serve and Enjoy
When you’re ready for dessert, take the ice cream out and let it sit at room temperature for about 5 minutes. This will make scooping much easier! Use an ice cream scoop to serve, and enjoy the creamy, high-protein treat you’ve just made. You might notice a slight sheen from the honey or maple syrup; that’s a sign of the delicious sweetness waiting for you!
Pro Tips for the Best Results
1. Use a High-Speed Blender
A high-speed blender is essential for achieving the smoothest texture possible. It breaks down the cottage cheese more efficiently, resulting in a creamier ice cream that will rival traditional recipes.
2. Chill Your Ice Cream Maker
If you have a bowl-type ice cream maker, make sure to freeze the bowl for at least 24 hours before use. A well-frozen bowl will help the ice cream freeze faster, leading to a creamier texture instead of icy crystals.
3. Consider Full-Fat Cottage Cheese
While low-fat cottage cheese works perfectly fine, using full-fat cottage cheese can elevate the creaminess of your ice cream. This extra richness will give you a more indulgent mouthfeel that mimics traditional ice creams.
4. Adjust Sweetness Before Churning
Taste your mixture before you churn it. Once it’s in the ice cream maker, you can’t adjust the flavor anymore. Make sure it’s just right, as the sweetness will dull slightly when frozen.
5. Add Mix-ins at the Right Time
To ensure your mix-ins, like nuts or chocolate, are evenly distributed, add them in the last few minutes of churning. This prevents them from sinking to the bottom and ensures every scoop has those delightful surprises.
6. Allow for Proper Freezing
After churning, it’s tempting to dive in immediately. However, letting it freeze for at least 2 hours will give you the best texture. If you skip this step, you might end up with a soft, unstructured ice cream that doesn’t scoop well.
7. Cover the Ice Cream Securely
When storing your ice cream, make sure to cover it tightly with plastic wrap before sealing with a lid. This prevents ice crystals from forming on the surface, which can alter the texture and flavor.
Common Mistakes to Avoid
1. Using Wet Cottage Cheese
Mistake: Skipping the draining process can lead to a watery ice cream.
Why it Ruins the Dish: Excess moisture creates an icy texture instead of a creamy one.
Correct Approach: Always drain your cottage cheese thoroughly before blending to achieve the desired consistency.
2. Not Tasting Before Freezing
Mistake: Failing to taste the mixture before churning or freezing.
Why it Ruins the Dish: You miss the chance to adjust flavors, leading to a bland or overly sweet dessert.
Correct Approach: Always taste and adjust sweetness and flavor before the mixture goes into the ice cream maker.
3. Over-churning the Ice Cream
Mistake: Allowing the ice cream to churn too long.
Why it Ruins the Dish: Over-churning can lead to an icy texture instead of a smooth one.
Correct Approach: Stop the churn when the mixture reaches a soft-serve consistency, then transfer it to the freezing container.
4. Not Letting it Sit Before Scooping
Mistake: Trying to scoop ice cream straight from the freezer.
Why it Ruins the Dish: Ice cream can be too hard to scoop, leading to frustration.
Correct Approach: Let it sit at room temperature for about 5 minutes before scooping for easier serving.
5. Ignoring Temperature Settings
Mistake: Not checking your freezer’s temperature.
Why it Ruins the Dish: If your freezer is too warm, the ice cream won’t set properly.
Correct Approach: Make sure your freezer is at a stable temperature of around -5°F (-20°C) for optimal freezing.
6. Mixing in Add-ins Too Early
Mistake: Adding mix-ins like chocolate chips at the beginning of the churning process.
Why it Ruins the Dish: They may sink to the bottom or get over-processed.
Correct Approach: Fold in mix-ins during the last few minutes of churning to ensure even distribution.
Creative Variations
1. Seasonal Variation
For a summer twist, incorporate fresh strawberries into your base. Simply blend 1 cup of hulled strawberries into the mixture before churning. This will give your ice cream a vibrant color and a delicious berry flavor that’s perfect for hot days.
2. Dietary-Friendly Version
Create a vegan-friendly version by replacing the cottage cheese with silken tofu and using agave syrup instead of honey. Blend until smooth and creamy, and you’ll have a dairy-free treat that’s still packed with protein and flavor.
3. Gourmet Elevated Version
For a restaurant-quality upgrade, use artisan honey and high-quality dark chocolate chips. You can also infuse the mixture with espresso powder for a rich coffee flavor. This will elevate your ice cream to a decadent dessert that feels indulgent yet nutritious.
4. Quick 15-Minute Version
If you’re short on time, make a quick version by blending 1 ½ cups of cottage cheese with 1 cup of yogurt and ½ cup of your sweetener. Simply pour into a container and freeze for about 1 hour, stirring every 20 minutes to prevent ice crystals. This technique allows you to enjoy a protein-packed dessert without an ice cream maker.
5. Kid-Friendly Version
For a kid-friendly twist, incorporate 1 mashed ripe banana into the mixture for natural sweetness and flavor. You can also add a handful of colorful sprinkles to make it visually appealing and fun for children.
6. International Twist
Infuse your ice cream with Thai flavors by adding coconut milk instead of almond milk and mixing in 1 tablespoon of finely shredded coconut. This will provide a tropical flair and a delightful texture that transports you to a beachside paradise.
Serving Ideas
When it comes to serving your Cottage Cheese Ice Cream, presentation is key to making this high-protein dessert even more enticing. Here are some beautiful ways to plate and serve this delightful treat:
1. Layered Parfait: In a tall glass, alternate layers of your cottage cheese ice cream with fresh fruits like strawberries, blueberries, and banana slices. Top with a sprinkle of granola and a dollop of whipped cream for an elegant finish.
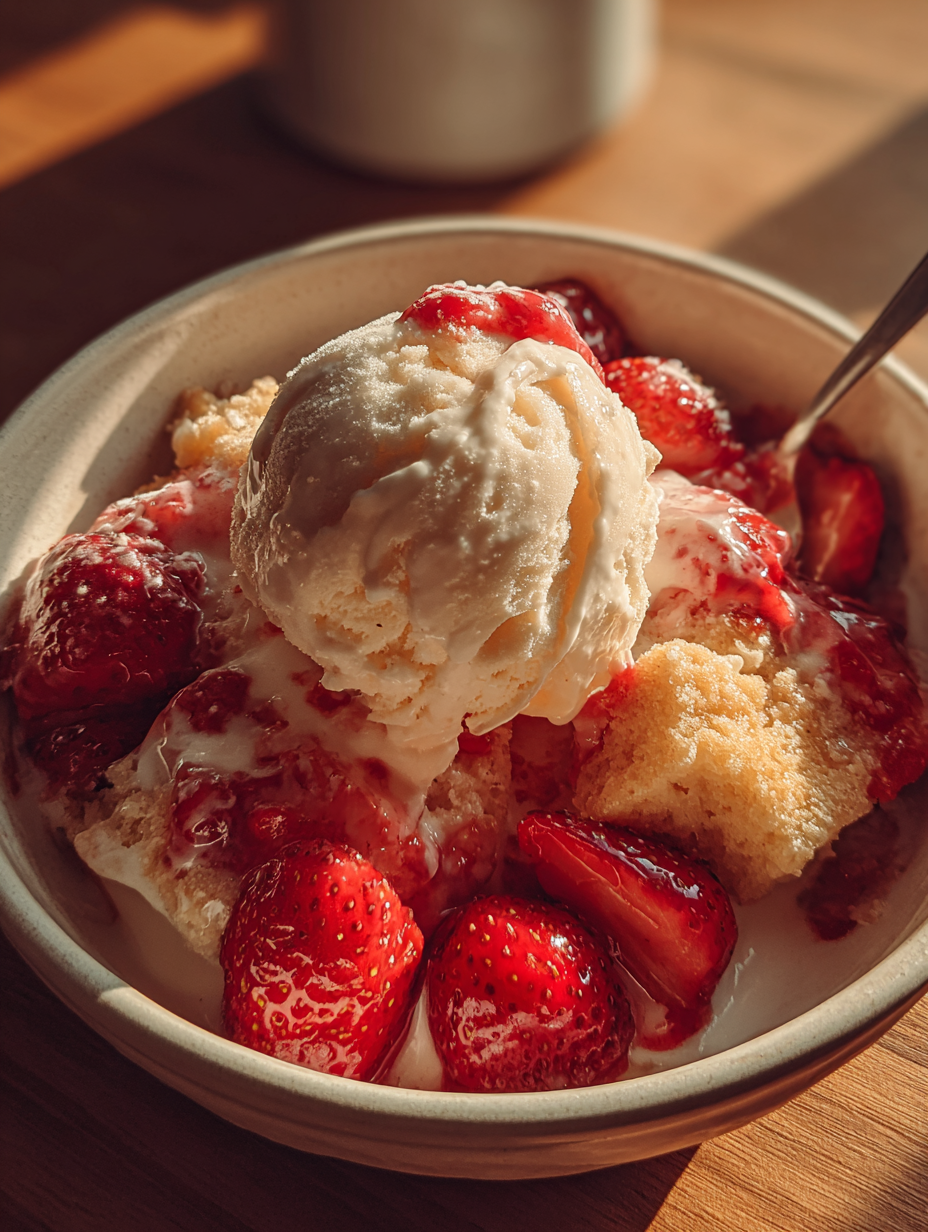
2. Chocolate Drizzle Delight: Serve a generous scoop of the ice cream in a shallow bowl. Drizzle with warm chocolate sauce and sprinkle with crushed nuts for a decadent touch. A few fresh mint leaves on top add a pop of color and freshness.
3. Ice Cream Sandwich: For a fun twist, scoop the ice cream between two soft, chewy cookies like oatmeal or chocolate chip. Roll the edges in mini chocolate chips or shredded coconut for extra flair.
4. Elegant Scoop: Use an ice cream scoop to serve a pristine ball of ice cream in a small, chilled dessert dish. Garnish with a sprig of mint, a few berries, and a light dusting of cocoa powder for a sophisticated look.
5. Fruit Salad Bowl: Serve the ice cream in a hollowed-out half of a pineapple or melon. This not only enhances the visual appeal but also adds a refreshing flavor contrast.
Remember, you want to serve about a half-cup portion per person to keep it satisfying yet light. Each of these presentations will invite your guests to dig in and enjoy every creamy bite!
What to Serve With
To elevate your Cottage Cheese Ice Cream experience, consider pairing it with complementary dishes that enhance its flavors. Here are some delightful options:
1. Chilled Berry Salad: A fresh salad made with mixed berries (strawberries, raspberries, and blueberries) tossed in a light honey-lime dressing. The tartness of the berries contrasts beautifully with the creaminess of the ice cream.
2. Lemon Tart: A zesty lemon tart adds a refreshing brightness, balancing the richness of the ice cream. The crisp crust and tangy filling provide a delightful textural contrast.
3. Dark Chocolate Espresso: A small cup of rich dark chocolate espresso is the perfect warm counterpart to the cold ice cream. The bitterness of the espresso enhances the sweetness of the dessert, creating a harmonious balance.
4. Granola and Yogurt Parfait: Serve a small parfait of yogurt layered with granola, which adds crunch and a tangy flavor, making a perfect sidekick to the creamy ice cream.
5. Homemade Fruit Sorbet: Offer a refreshing fruit sorbet as a palate cleanser between bites. A strawberry or mango sorbet will complement the dessert without overpowering it.
6. Nutty Biscotti: Crunchy almond or hazelnut biscotti pairs nicely with the smooth ice cream, providing a satisfying crunch along with a nutty flavor that echoes any nuts you’ve mixed into your ice cream.
Each of these pairings brings its own unique flavor and texture to the table, making your dessert experience even more delightful.
Storage Guide
To keep your Cottage Cheese Ice Cream fresh and tasty, proper storage is essential. Here’s how to do it right:
– Container Type: Use an airtight container, ideally made of glass or high-quality plastic, designed for freezing. Glass containers are great for maintaining freshness and are less prone to absorbing odors.
– Fridge Temperature: Store your ice cream in the freezer at a consistent temperature of 0°F (-18°C) or lower. This ensures it remains firm without becoming too icy.
– Shelf Life: When stored properly, the ice cream will keep for up to two weeks. After that, its texture and flavor may begin to deteriorate.
– Signs of Spoilage: Before serving, check for any ice crystals forming on the surface, which indicate freezer burn. If it has an off smell or unusual color, it’s best to discard it.
– Refreshing Before Serving: To restore its creamy texture after freezing, let the ice cream sit at room temperature for about 10-15 minutes before scooping. This allows it to soften slightly, making it easier to serve while retaining its delightful texture.
Freezing Tips
This Cottage Cheese Ice Cream recipe freezes exceptionally well, allowing you to enjoy it anytime. Here are some valuable tips for freezing:
– Portioning: If you anticipate not finishing the entire batch, consider freezing the ice cream in individual serving sizes. Use small containers or ice cube trays for easy portions.
– Wrapping Method: For best results, cover the surface of the ice cream with a piece of parchment paper before sealing the container. This creates an extra barrier against air, reducing the risk of freezer burn.
– Labeling: Clearly label your containers with the date of freezing to keep track of freshness.
– Freezer Life: The ice cream can be stored in the freezer for up to two weeks without significant loss in quality.
– Thawing: When ready to enjoy, take the container out of the freezer and place it in the refrigerator for about 30 minutes. This gradual thawing helps maintain the creamy texture.
Reheating Guide
While you usually won’t need to reheat ice cream, if you want to warm up any leftovers or mix it into a recipe, here’s how:
– Microwave: Place a scoop in a microwave-safe bowl and heat on low power (30-50%) for about 15-30 seconds. Stir between intervals to prevent dryness.
– Oven: For those looking to warm it gently, preheat your oven to 200°F (93°C). Place the ice cream in an oven-safe dish, cover it loosely with foil, and heat for 5-10 minutes until slightly softened.
– Stovetop: If you’re feeling adventurous, you can melt it on the stovetop. Place the ice cream in a saucepan over low heat, stirring gently and adding a splash of milk to help it rehydrate. This will take about 5 minutes.
To restore the original texture and flavor, make sure to monitor closely during the heating process, as you want it to soften rather than melt completely.
Nutrition Overview
Each serving of this Cottage Cheese Ice Cream packs approximately 200 calories, making it a guilt-free treat. Here’s a breakdown of the nutritional values per serving:
– Protein: 14g
– Carbohydrates: 30g
– Fat: 4g
– Fiber: 1g
– Sugar: 18g
The cottage cheese is the star here, providing a significant amount of protein, which helps keep you feeling full. The use of honey as a sweetener not only adds a natural sweetness but also contributes beneficial antioxidants. The addition of almond milk keeps the recipe lower in calories while still offering a creamy texture. This dessert is not only delicious but also nutritious, making it a wonderful option for anyone looking to indulge without straying from a healthy diet.
Frequently Asked Questions
Q: Can I use dairy-free cottage cheese?
A: Yes, you can use dairy-free cottage cheese alternatives made from nuts or soy. Just ensure it’s a texture that can blend smoothly for the best results.
Q: What sweeteners can I substitute for honey?
A: Maple syrup and agave nectar are great vegan alternatives to honey. If you prefer something lower in calories, you can use stevia or erythritol, but adjust the amount to taste.
Q: Can I make this recipe without an ice cream maker?
A: Absolutely! After blending the mixture, pour it into a shallow dish and freeze. Every 30 minutes, stir the mixture with a fork to break up ice crystals, repeating this until it reaches your desired consistency.
Q: How can I adjust the flavor of this ice cream?
A: You can add flavorings such as cocoa powder for chocolate ice cream, or mix in vanilla bean paste for a more intense vanilla flavor. Fresh fruits or flavor extracts like almond or mint can also be added for variety.
Q: Is this recipe suitable for people on a low-carb diet?
A: While not specifically a low-carb recipe, you can reduce the amount of honey or use a low-carb sweetener to make it more suitable for a low-carb lifestyle.
Q: Can I add protein powder to this recipe?
A: Yes! Adding a scoop of your favorite protein powder can increase the protein content even more. Just blend it in with the other ingredients until smooth.
Q: How can I make this recipe lower in sugar?
A: To reduce sugar, consider using a sugar substitute or simply cutting down on the honey. The natural sweetness of the cottage cheese may be sufficient for some tastes.
Q: What can I do if my ice cream is too icy after freezing?
A: If your ice cream turns out icy, try blending it again with a splash of milk to restore creaminess. The key is to ensure your ingredients are well-blended and to avoid freezer burn.
Final Thoughts
Making Cottage Cheese Ice Cream is not only a fun kitchen project but also a rewarding way to enjoy a delicious dessert that’s high in protein and low in guilt. Remember, the most important tips are to blend your ingredients until they’re perfectly smooth and to store your ice cream in an airtight container to maintain its creamy texture.
I genuinely hope you give this recipe a try! It’s a delightful way to indulge your sweet tooth while nourishing your body. Don’t forget to experiment with flavors and toppings to make it your own. Share your results with friends and family, and watch their faces light up with joy as they savor this unique treat!

Cottage Cheese Ice Cream Recipe (High Protein Dessert) 🍦🥄
Ingredients
- 2 cups low-fat cottage cheese ensure it is well-drained
- 1 cup unsweetened almond milk or any milk of choice
- 1/2 cup honey or maple syrup for vegan option
- 1 teaspoon vanilla extract for flavor
- 1/4 teaspoon salt to enhance sweetness
- 1 tablespoon lemon juice freshly squeezed
- 1/2 cup dark chocolate chips optional, for mix-ins
- 1/2 cup crushed nuts optional, for added texture
- 1 tablespoon cocoa powder for chocolate flavor if desired
Instructions
- In a blender, combine the low-fat cottage cheese, almond milk, honey, vanilla extract, salt, and lemon juice. Blend until completely smooth and creamy.
- Taste the mixture and adjust sweetness if needed by adding more honey or sweetener. If desired, add cocoa powder for a chocolate version and blend again.
- Transfer the blended mixture to an ice cream maker and churn according to the manufacturer's instructions, typically about 20-25 minutes until it reaches a soft-serve consistency.
- If using, fold in dark chocolate chips and crushed nuts gently into the churned ice cream.
- Scoop the ice cream into a container and freeze for at least 2 hours to firm up before serving.
- When ready to serve, let the ice cream sit at room temperature for a few minutes for easier scooping.
Notes
Tip 2: Store in an airtight container in the freezer for up to 2 weeks.
Variation: Add fresh fruits like strawberries or blueberries for a fruity twist.